Apple streusel cake for MOTHER’S DAY!

I made this cake for mothers day. Let’s just say I earned some bonus points. This cake is very simple but packed with flavour!

Even though this cake doesn’t photograph well, trust me when I tell you, it’s easily gulped down. Quickly and in large quantities!

Apple cake with streusel topping

4 eggs

4 dl / 1.75 cups granulated sugar

100 grams butter

6 dl / 2.5 cups all-purpose flour

4 teaspoons baking powder

2 teaspoons vanilla

1 tablespoon ground cinnamon

pinch of salt

2 dl / 0.8 cup yoghurt or sour cream

8 small or 4 large apples of your choice

3 tablespoons apple sauce

Topping:

50 grams butter

1.5 dl / 0.6 cup all-purpose flour

1 dl / 0.4 cup granulated sugar

Batter:

Set your oven to 175 degrees Celsius (350F). Melt your butter and set it aside to cool. Whisk the eggs and sugar until white and fluffy. Mix the dry ingredients and sift into the egg mixture, then add the yoghurt or sour cream and melted butter a stir until combined. Peel the apples and dice into relatively small cubes, fold them into the batter together with the apple sauce. Grease and bread a springform pan (approx. 24cm / 9.5 inches in diameter). Pour the batter into the springform pan and bake in the oven for 20 minutes.

While the cake is baking, pinch together the ingredients for the topping until it has the consistency of damp sand. When the 20 minutes are up, take the cake out of the oven and put the streusel topping on. Then bake for an additional 30-40 minutes. Test it with a fork in the middle of the cake, it should come out clean. It doesn’t have to come out completely dry but it also shouldn’t be wet.

Happy baking!

French chocolate truffle cake. YES.

This was passed down to me by my grandmother and it’s a hit every time I make it. I’ve had requests for the recipe multiple times so I thought I’d be well worth a spot on the blog! So here it is, the recipe for my French chocolate truffle cake (truffle as in the chocolate candy, not the mushroom).

4 eggs

6 dl / 2.5 cups granulated sugar

200g melted butter

pinch of salt

3 dl / 1.25 cups all-purpose flour

8 tablespoons cocoa powder

0.5 dl / 0.25 cup cold strong coffee

Optional: 150 grams of chocolate ganache or melted chocolate (I used some ganache I had left over in the fridge). Also you can flavour the cake with pretty much anything, like: orange zest, amaretto, berries or even spices.

Turn on the oven to 175°C (350°F).

Stir together sugar and eggs until well mixed. Do not whisk, you don’t want air in this batter. Then stir in the butter and sift the dry ingredients into the egg batter and mix  gently until smooth. Stir in the coffee, ganache and any flavourings.

Grease a spring form pan and pour in the batter. Bake for approximately 30 minutes. Check every minute or so after 20 minutes has passed to make sure it doesn’t come out dry. The cake should still be quite wet in the middle but relatively dry around the edge of the pan.

The cake should sit in the fridge for at least 8 hours (I usually bake it in the evening and let it sit in the fridge over night).

Serve in any manor you wish!

Happy baking!


Classic cream scones – with a healtier adaption available!

I’m not British, so afternoon tea isn’t part of my culture. But that doesn’t mean I can’t enjoy a nice cup and some delightful cream scones. These turned out beautifully! Cream of the crop if I may say so myself. Pun intended. I made a healthier alteration and substituted the heavy cream for light coconut milk, mostly because I had an opened can in the fridge and also because I was curious to see if they’d turn out well. And so they did, so very well.


Cream scones:

2 cups all-purpose flour
2 tablespoons granulated sugar, plus extra for sprinkling
1 tablespoon baking powder
1/2-3/4 teaspoon salt
6 tablespoons (3 ounces, 3/4 stick) cold unsalted butter
1 cup plus 2 tablespoons heavy cream, very cold (OR equal amount of light coconut milk. This is what I used and they turned out great!)

Preheat an oven to 425°F (220°C).

Combine the flour, sugar, baking powder and salt in a bowl. Whisk to combine, then chill in the freezer while you proceed.

Cut the butter into small dice, then chill it as well.

Line a baking sheet with parchment paper and lightly flour a work surface. Assemble a food processor fitted with the metal blade, or get out a large bowl, a pastry cutter and spatula.

Put the dry ingredients into the bowl of the food processor, pulse a few times to lighten. If doing by hand, whisk or fork the flour mixture to aerate. In the processor, remove the cover and evenly distribute the cubed butter over the flour mixture. Replace the cover, and use short, quick pulses to bring the mixture to something that resembles an uneven meal.

If by hand, toss the butter into the flour, then use a pastry cutter or two knives to cut the butter into irregular, pea-sized chunks.

With the processor, add about half of the cream then pulse a few times. Add three-quarters of what’s left, and pulse maybe three times more. Remove the cover and take a look – the dough should be crumbly and light, but if you pick up some and squeeze it in your hand, it should stick together. If it does, stop. If it doesn’t, keep adding a few drops of cream, pulsing once or twice, then checking again. Don’t worry if you don’t use all the cream.

If working by hand, it is much the same process, but using a spatula to fold and turn the dough to incorporate the liquid. Again, judicious is best with the cream, you don’t want a soggy dough.

Turn the dough out onto the floured work surface and knead, gently and lightly, until the dough is fully together; you should still see dots of butter here and there. Pat the dough out into a rough round, and dust with a bit of flour.

Divide the dough into three, and shape each ball of dough into a 4″ round about 3/4″-1″ thick, cut each round into four wedges. Or, using a whatever you have on hand to make round shapes, I used a tall glass, cut out rounds. Place on the prepared baking sheet.

Bake the scones in the preheated oven until lightly golden at the edges and dry on their cut sides, around 12-15 minutes. The tops should be puffed and they will feel light for their size. Remove from the oven and place on a cooling rack set over another baking sheet. Sprinkle liberally with sugar and cool for at least 5 minutes before serving. Gobble ’em up!

I served them with some nice lemon curd. And butter…

Happy baking!

Pâte à Choux – anyone can make it! (Chocolate éclairs)

So, finally, this post goes LIVE! I’ve been deep in slumber for what feels like over 9000 years. See what I did there? No? OK… I have terrible pollen allergies and this year seems to have one of the highest rates of pollen particles in the air in a long time, that’s global warming for ya. Anyway, I’ve been working on a couple of drafts for a while but simply haven’t gotten around to finishing them, but here we go, the first of many to be posted.

So, éclairs, you say? Yeah… Not an easy one. I’ve never had an éclair before either, which didn’t help. Turns out, it’s really difficult to make something when you have no idea what the end result is supposed to smell, taste or look like. I did well though, my stepmother said they taste the way they’re supposed to but frankly I don’t see what the big fuss is about. Not my favourite pastry. Don’t get me wrong, they weren’t inedible or anything, it’s just that, with all the time and effort that went into making these, I was expecting fireworks. What I got were a slight fizz and some smoke. But don’t get discouraged, I definitely think it’s something you should try! I learned a lot from this endeavour and I appreciate the experience. So give it a try! Here’s the recipe!

Chocolate Éclairs by Pierre Hermé (adapted recipe)

makes 20-24 éclairs

Ingredient list:

Pâte à Choux
Cream Puff Dough

1/2 cup (125g) whole milk
1/2 cup (125g) water
1 stick (4 ounces; 115g) unsalted butter, cut into pieces
1 teaspoon sugar
1/4 teaspoon salt
1 cup (140g) all-purpose flour
5 large eggs, at room temperature

Crème Pâtissière au Chocolat
Chocolate Pastry Cream

2 cups (500g) whole milk
4 large egg yolks
6 tablespoons (75g) sugar
3 tablespoons cornstarch, sifted
7 oz (200g) bittersweet chocolate, melted
2 1/2 tbsp (1 1/4 oz: 40g) unsalted butter, at room temperature

optional: 1 teaspoon of instant coffee powder

Chocolate Glaze
This batch makes for about 1 cup or 300g of glaze, YOU WILL ONLY NEED ABOUT HALF OF THAT

1/3 cup (80g) heavy cream
3½ oz (100g) bittersweet chocolate, finely chopped
4 tsp (20 g) unsalted butter, cut into 4 pieces, at room temperature
7 tbsp (110 g) Chocolate Sauce (recipe below), warm or at room temperature

Chocolate Sauce – for the glaze
makes 1 ½ cups or 525g – you will not need the full batch

4 1/2 oz (130 g) bittersweet chocolate, finely chopped
1 cup (250 g) water
1/2 cup (125 g) crème fraîche, or heavy cream
1/3 cup (70 g) sugar

INSTRUCTIONS:

Pâte à Choux:

In a heavy bottomed medium saucepan, bring the milk, water, butter, sugar and salt to the boil.
Once the mixture is at a rolling boil, add all of the flour at once, reduce the heat to medium and start to stir the mixture vigorously with a wooden spoon. The dough comes together very quickly.Do not worry if a slight crust forms at the bottom of the pan, it’s supposed to. You need to carry on stirring for a further 2-3 minutes to dry the dough. After this time the dough will be very soft and smooth.

Transfer the dough into a bowl of a mixer fitted with the paddle attachment, or using your handmixer or if you still have the energy, continue by hand. Add the eggs one at a time, beating after each egg has been added to incorporate it into the dough. You will notice that after you have added the first egg, the dough will separate, once again do not worry.

As you keep working the dough, it will come back all together again by the time you have added the third egg. In the end the dough should be thick and shiny and when lifted it should fall back into the bowl in a ribbon.
The dough should still be warm. It is now ready to be piped and baked.

Preheat your oven to 375 degrees F (190 degrees C). Divide the oven into thirds by positioning the racks in the upper and lower half of the oven. Line two baking sheets with waxed or parchment paper.
Fill a large pastry bag fitted with a 2/3 (2cm) plain tip nozzle with the warm cream puff dough. Pipe the dough onto the baking sheets in long, 4 to 41/2 inches (about 11 cm) chubby fingers. Leave about 2 inches (5 cm) space in between each dough strip to allow them room to puff. The dough should give you enough to pipe 20-24 éclairs.


Slide both the baking sheets into the oven and bake for 7 minutes. After the 7 minutes, slip the handle of a wooden spoon into the door to keep in ajar. When the éclairs have been in the oven for a total of 12 minutes, rotate the sheets top to bottom and front to back. Continue baking for a further 8 minutes or until the éclairs are puffed, golden and firm. The total baking time should be approximately 20 minutes.

Crème Pâtissière:

In a small saucepan, bring the milk and coffee powder to a boil.  In the meantime, combine the yolks, sugar and cornstarch together and whisk in a heavy-bottomed saucepan.

Once the milk has reached a boil, temper the yolks by whisking a couple spoonfuls of the hot milk into the yolk mixture. Continue whisking and slowly pour the rest of the milk into the tempered yolk mixture.

Strain the mixture back into the saucepan to remove any egg that may have scrambled.  Place the pan over medium heat and whisk vigorously (without stop) until the mixture returns to a boil. Keep whisking vigorously for 1 to 2 more minutes (still over medium heat). Stir in the melted chocolate and then remove the pan from the heat.

Scrape the pastry cream into a small bowl and set it in an ice-water bath to stop the cooking process. Make sure to continue stirring the mixture at this point so that it  remains smooth.

Once the cream has reached a temperature of 140 F (60 C) remove from the ice-water bath and stir in the butter in three or four instalments. Return the cream to the ice-water bath to continue cooling, stirring occasionally, until it has completely cooled. The cream is now ready to use or store in the fridge.

Chocolate Glaze:

In a small saucepan, bring the heavy cream to a boil. Remove from the heat and slowly begin to add the chocolate, stirring with a wooden spoon or spatula.
Stirring gently, stir in the butter, piece by piece followed by the chocolate sauce. While still hot, dip the top half of your éclair in the glaze, or drizzle on using a spatula. Set aside to cool.

Chocolate Sauce:

Place all the ingredients into a heavy-bottomed saucepan and bring to a boil, making sure to stir constantly.  Then reduce the heat  to low and continue stirring with a wooden spoon until the sauce thickens.

It may take 10-15 minutes for the sauce to thicken, but you will know when it is done when it coats the back of your spoon.

Assembly:

Using a serrated bread knife, cut the éclairs in half (see picture above). Pipe the filling into the bottom half of one éclair, then place the glazed half on top. Serve immediately.

END NOTES:

  • Once the dough is made it needs to be piped immediately
  • If you don’t wan to bake the éclairs right away, you can freeze them after they’ve been piped by simply piping the dough onto parchment-lined baking sheets, then slide the sheets into the freezer. Once the dough is completely frozen, transfer the piped shapes into freezer bags. They can be kept in the freezer for up to a month.
  • The pastry cream can be made 2-3 days in advance and stored in the refrigerator.
  • In order to avoid a skin forming on the pastry cream, cover with plastic wrap pressed onto the cream.
  • Tempering the eggs raises the temperature of the eggs slowly so that they do not scramble.
  • If the chocolate glaze is too cool (i.e. not liquid enough) you may heat it briefly? in the microwave or over a double boiler. A double boiler is basically a bowl sitting over (not touching) simmering water.
  • It is best to glaze the eclairs after the glaze is made, but if you are pressed for time, you can make the glaze a couple days ahead of time, store it in the fridge and bring it up to the proper temperature (95 to 104  F) when ready to glaze.
  • The chocolate SAUCE can be stored in the fridge for up to two weeks in an air tight container. Before using, heat up slightly in the microwave or in a double boiler.
  • The éclairs can be kept in a cool, dry place for several hours before filling.
  • I AM SURE I PROBABLY MISSED SOMETHING SO PLEASE TELL ME IN THE COMMENT SECTION IF I DID OR IF YOU HAVE ANY QUESTIONS REGARDING THE RECIPE! THANK YOU!


LADURÉE. Hell yes.

So, recently, there has been a new store opening in Stockholm that the whole city is buzzing about. If you hadn’t already guessed, Ladurée has come to town! Hell yes! I’ve been meaning to stop by since it opened about a week ago but I haven’t gotten around to it. Today though, I stepped into pastel paradise. I was so overwhelmed by the atmosphere that I forgot to take pictures, not only inside the store, but I also forgot to actually photograph the macarons I purchased. I mean, really Carolina, really…? Anyhow, I went all out and bought myself five macarons that I brought home in my little Ladurée bag. Like a proud mama. Kind of. I got chocolate, cherry blossom, cassis, salted caramel and lemon. My favourite was definitely the cassis, absolutely remarkable! If I go there again (if..? more like when), I’ll take some nice pictures for you blog readers and the interwebs! Anyhow, I know I’m super slow, I have three blog posts that will go up this week. Sorry about the horrible delay, I’ve just been so busy and with pollen season slamming me in the face, I’ve been pretty much just studying and sleeping these past few weeks…

Happy baking!

I’m not dead

So, I’ve been gone for awhile… Sorry! I have a lot going on right now, I’m finishing my last semester of high school right now as well as dealing with some personal issues. Just wanted to let you know I’m making éclairs this weekend. YES! You heard it! Since the macarons worked out so well I thought I’d delve into some more French delights! Well, now you know what you have to look forward to! You’ll hear from me soon!

Happy baking!

Lemon-y mini crepes!

You can serve these any which way you like, I made little towers, layered with lemon curd and berries. They were awesome.

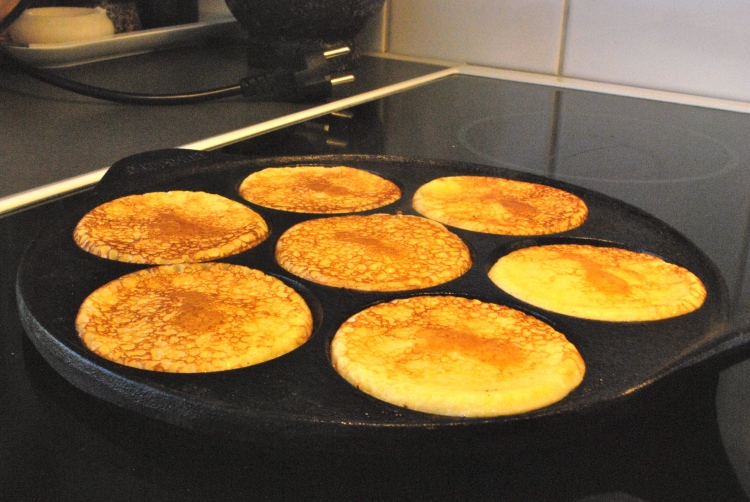
In Sweden we call these “plättar”, if I were to make them larger they’d just be pancakes. Well, Swedish pancakes… They’re basically crepes. Whatever, this is becoming confusing.

They’re extremely easy to make, even easier if you have a custom “plättlagg”, which is a special skillet with round indentations, like mini pools that you fill with batter. This makes the process of getting even crepes easier, but a regular pan will work just fine. A cast iron skillet or griddle works best!

Fill the pools with batter, let them become golden and…

… flip! Et voilà! Mini crepes!

This makes about 20 mini crepes (7cm / 2.75 inches in diameter)

If you were to make large crepes with this recipe I’d estimate that you could get about 2-3 of them. I’d count on 1 egg per person, so basically just multiply this recipe with however many people you want to feed. Although, if you’re doing this as a dessert, you wont need as many. This recipe made two of those little crepe-towers.

Recipe:

1 egg (preferably organic)

1 dl OR 0.45 cup all-purpose flour

1 ½ tablespoons melted butter

1 ¾ dl OR 0.75 cup milk

2 teaspoons sugar

1 teaspoon lemon zest

1 tablespoon lemon juice

pinch of salt

+ extra melted butter for the griddle

HOW TO:

Whisk the egg, flour, butter and half of the milk together until smooth. Add the rest of the milk, the lemon zest + juice, sugar and salt and stir together until combined.

Let the batter rest for about 15 minutes. While it’s resting, you can begon heating up your griddle. Brush the griddle/pan with butter and plop little rounds of batter into it.

Fry until golden (see picture above).

Serve as I did with lemon curd and berries or in any manor you wish.

Happy cooking!

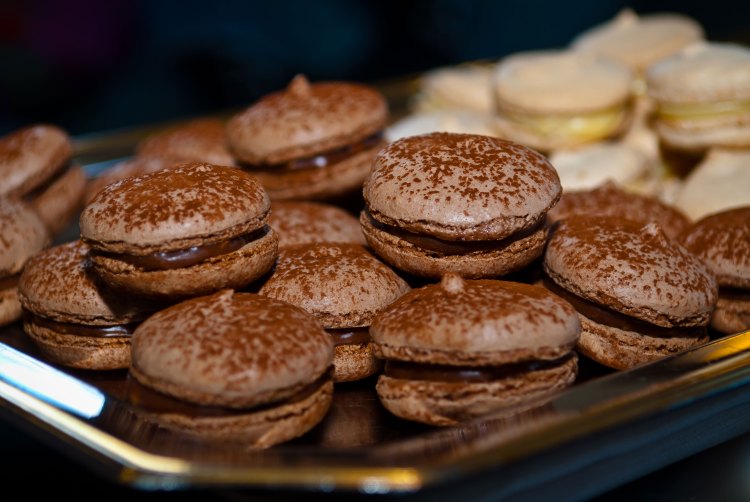
Macarons and vows! (chocolate/hazelnut & lemon macarons)

So, this past weekend my father got married! Again… Hehe. No, but jokes aside, it was a really nice day, there was a short ceremony in city hall and then we had brunch at the Radisson Blu Strand Hotel. I had made macarons for the occasion which our fifteen person party gobbled down in the suite my dad had booked in the hotel. There was a lot of champagne drinkin’ too, and before you comment, yes, I am old enough to drink. The legal drinking age in Sweden is 18, thank you very much.

I made two kinds, lemon macarons with a lemon filling and chocolate macarons with a chocolate & hazelnut filling. No need for further explanations, let’s get to the recipe.

I used my standard Pierre Hermé macaron shell recipe but I altered it slightly to make them lemon/chocolate flavoured. This batch is also about one and a half of the original (which you can find here). So, this recipe makes about 22 of each kind. I made the meringue in one batch and then divided it between two almond mixtures.

NOTE: If you would like the recipe of how to make 30 shells (as from the original recipe) but in one of the flavours, write a comment with contact info and I’ll e-mail it to you. It takes up too much space to write everything down in one post. Also, if this is your first try at making macarons I suggest you go this this recipe, my instructions are much more detailed in that one as that was my first try.

Macaron Shells:

Italian meringue:

225g granulated sugar

57g water

82,5g aged egg whites

Mix for chocolate macarons shells:

112,5g ground almonds/almond meal

97,5g icing sugar

15g pure cocoa powder

41g aged egg whites

Mix for lemon macaron shells:

112,5g ground almonds/almond meal

112,5g icing sugar

1 teaspoon finely grated lemon zest

41g aged egg whites

HOW TO:

Start by sifting and combining the dry ingredients for the mixes into two separate bowls. Then add the egg whites on top of each mix but do not stir. Once you fold in the meringue, the egg whites will combine with the rest, don’t worry about that.

Make the meringue by bringing the water and sugar to a boil in a pot. While that is bubbling, whisk the egg whites until foamy. When the sugar has reached approximately 110 degrees CELSIUS (230 F), pour them into the egg white foam. Do this while the mixer is on and drizzle the sugar syrup on the side of the bowl so that it goes via the wall of bowl into the egg whites and not straight into them. Keep whisking the meringue until it has reached body temperature.

Weigh the meringue and divide into two portions, add the two portions to the two mixes (one portion goes into one of the mixes but I assume you understood that part).

Fold the meringue into the almond mix until it’s “pipeable”. Sure, that’s a word…

Pipe onto baking sheets and the rap against the counter 2-3 times to pop any air bubbles that might have formed. Let the piped shells sit in room temperature for 30 minutes before baking in the oven for 12 minutes at 180 degrees CELSIUS (355F). During the last 4 minutes of baking, open the oven door at least two times to let out any steam.

Chocolate hazelnut filling:

150 grams milk chocolate with chopped hazelnuts (I used a Swedish brand called Marabou)

130g heavy cream

25g butter

pinch of salt

Chop the chocolate, bring the cream to a boil and pour over the chocolate. Stir until glossy, add the butter and salt. Keep stirring until the butter is melted, if the mix is too cool and the butter wont melt, heat it back up gently and then stir until cooled and smooth. Set in the fridge to cool.

Lemon filling:

100g good quality white chocolate

25g heavy cream

55g lemon curd

juice of half a lemon

zest of one lemon

IF NECESSARY: corn starch

Chop the chocolate. Bring the cream and lemon curd to a boil, pour over the chocolate. Stir until smooth. Add the lemon juice and zest. Set in fridge to cool. If it’s too loose, add some corn starch, little by little and refrigerate in between until your desired consistency is reached.

Assemble the macarons and let sit for about 24 hours in the fridge to set. EAT!

Lessons I learned this time around:

  • Don’t put too much water under the baking sheet. It will mess up your shells!
  • Get a frickin’ piping bag you idiot novice! Plastic bags are annoying as hell and the end result will never be symmetrical.
  • Don’t dust your shells with cocoa before you bang them against the counter, you will end up with cocoa all over and the shells will look like you licked them before assembly or something.
  • The egg whites will diminish in volume as you age them, weigh up the amount you need and age them and you’ll be fine. You might end up with less than what is called for in the recipe but as long as you started out with the right amount you should be fine, you’ll just have to be a little clever with the kitchen scale, that’s all. The total amount of egg whites you should age for this recipe is 165 grams.

Happy baking!

Upcoming!

There are two posts on the way! My computer is acting up and it wont acknowledge my memory card for my camera when I “plug” it in. I’m trying to fix it though but I don’t want to upload posts without pictures, that’s just boring…


LOVE,

Carolina

Super smoothie!

I’m not a big breakfast person. If I eat anything at all, it’s usually just a bowl of All-Bran cereal with milk. End of story. Mostly because I’m just not hungry that early in the morning (hello, I have school and I wake up at like 6 o’clock in the morning). But during the weekend, breakfast usually happens around noon, which opens up a whole new dimension of possibilities. Smoothies are great, especially for people like me, that have a hard time actually making and eating breakfast. It’s liquid, so your strength wont be diminished by all that chewing, HA! And all the ingredients are packed with nutrients which wakes you up and nourishes both your brain and your body.

I love my my little mini grater. It’s adorable. OK, enough with the girly talk.

Here is the “recipe”:

Metric/US

1 ripe banana

2 dl / 0.85 cup juice of your choice (I used some fresh orange and pineapple juice that was left over from earlier)

½ teaspoon freshly grated ginger

2 tablespoons low fat yoghurt

Blend the banana, juice and ginger until smooth. Then add the yoghurt and blend for 30 more seconds to whip some air into it. Done!

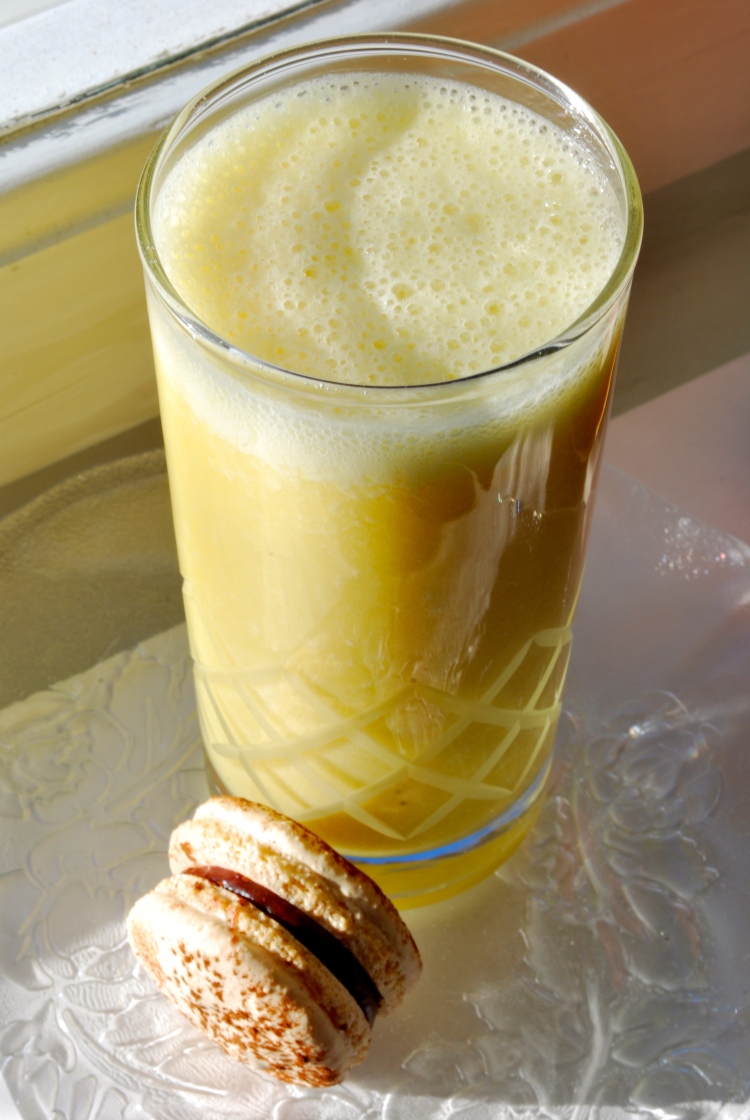
I don’t really use recipes for making smoothies, it’s mostly about using what you have and going with what flavours you like. But for the sake of education, I thought this would be nice. And yes, I had a macaron for breakfast, don’t judge.

Happy… blending! ;D